I've gotten some questions about how the video in my recent animation article as well as the video of Romain's excellent photo viewing app were created. I thought I'd spend a few words on it in case anyone else wants to do something similar.
I can tell you how I did it, but it'll cost you. About $200, in fact; that's how much I paid Amazon for the setup I used.
First, the reasons I wanted the device:
- Debugging animations is hard: So many of the issues I chase with animations are timing-dependent. So the typical approach of step-debugging doesn't work; as soon as you stop in the debugger, you've lost the stream of whatever is causing the issue.. Nor does it help to hack the code and add tracing output everywhere, because sometimes you can't easily access the code in question (although this is what I end up doing in many cases where I can change the code). Sometimes it helps to dramatically sloooooooow down the animations, so that you can see it unfold instead of trying not to blink and miss the action. But what would be really nice is to be able to catch the actual animation, at speed, and then be able to see it played back in slow motion. That's what HDMI recording gives me. I thought about getting a high-speed camera, but between the cost, the reliance on a lot of light for each frame, and the setup for any shot, that didn't seem like a great general solution.
- Screencasting: I've been wanting to do more blogging about Android development. In particular, I'd like to post some video tutorials, something like I did in a previous life. I find that forum to be very efficient, once I get into the groove. I can talk through a demo, show the demo, and show the code, and do so in far less time than it takes me to write an article, for example. But that means I'll need some way to screencast from the device that's running the animation code that I'll be talking about. I could take a video of me playing with the device, but it's more of a hassle to set it up, and the quality of the video just isn't as good.
The solution: an HDMI recorder. The Xoom device on which I recorded the video has an HDMI output port. So all I needed was a device on the other end of the HDMI cable to record that output stream. I picked up an Intensity Pro PCI Express card by Blackmagic, and that did the trick. I installed the card in my Mac Pro, installed the software that came with the device, and it was a simple matter of running the capture software to capture the actual video stream. You can also use other capture software, such as Adobe Premiere, but I found the software that came with the device sufficient for my needs. I did notice an occasional dropped frame (I had to set a setting in the software to not stop recording when there is a dropped frame), but overall it seems fine, at least for my use cases.
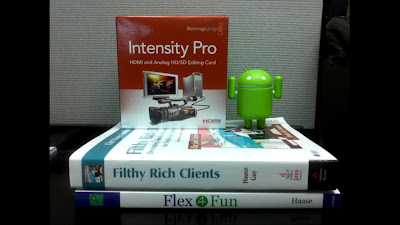
Here's a picture of the recorder's box (the card is in my machine and I didn't feel like taking it out). I like the sheer recursiveness here: it's a picture taken with the device of the recorder, uploaded via HDMI from the device to the recorder. I've put some other completely random objects on the shelf with it to give you a sense for its size (small).

I'm sure there are other solutions out there, but this setup works for me.